- Joined
- Aug 30, 2022
- Messages
- 17
- Reaction score
- 0
- Points
- 1
A quick guide is available in-game through NPC Fred located in the Tavern on Tutorial Island
This is an supposed to be an exhaustive guide to help understand the custom drinks on our Skyblock server and how to brew them. The contents of this post will be updated and edited when needed.
-----------------------------------------------------------------------------------------------------------------------------------------------------------------------------------------------------------------------------------
Intro
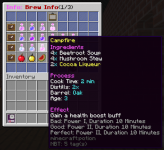
Before you start brewing, you need to know what drink you want to brew. All drink recipes can be found and reviewed with NPC Anya located in the Tavern Cellar on Tutorial Island.
Certain drinks can mostly provide benefits which ranges from Items such as keys, Currencies such as coins, or Effects such as Health boost.
All drinks will make you drunk by a certain % amount, as you get drunk you will stumble around, chat incoherently, and eventually vomit.
-----------------------------------------------------------------------------------------------------------------------------------------------------------------------------------------------------------------------------------
Rating
When you finish a brewing a drink, it will get a quality ★★★★★ rating based on how accurately you follow a drink's recipe. The quality rating can range from 1-10 and will be displayed in the drink's Lore in the form of ☆ and ★, Each ☆ is equivalent to 1 and each ★ is equivalent to 2. Based on quality, the drink gets a Grade which can be Bad (Quality 1-4), Good (Quality 5-9), Perfect (Quality 10).
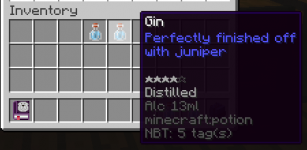
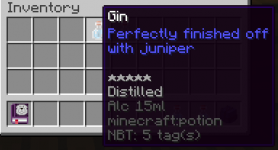
The effect, name, and lore of a drink can change depending on it's quality or grade (more often it will be grade based). For example, the drink type below called Campfire shows that its effect of Health Boost becomes stronger depending on its grade and that it's lore and name also change too.
-----------------------------------------------------------------------------------------------------------------------------------------------------------------------------------------------------------------------------------
Step 1 - Cooking Cauldron
Now to get started with brewing a drink, you'll need to set up several faculties. Namely, a Cooking Cauldron, Distilling Stand, and Aging Barrel. A quick example of these facilities is available in-game in the Tavern Cellar on Tutorial Island.
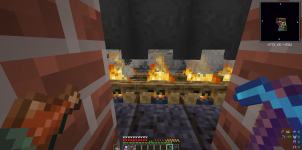
To create a Cooking Cauldron, you need a cauldron with water placed directly over any heat source, it is highly recommended to use campfires as the heat source but other sources like lava or fire work too.
At this point you've made a Cooking Cauldron and can now start cooking your ingredients to brew.

To put ingredients in to start cooking, just right click your cooking cauldron with your ingredient in hand to add it to the cauldron. At this point you can continue to add ingredients as you see fit, just know that if it doesn't resemble a recipe it will result in a failed base drink.
Anyways, while your ingredients are in the cauldron they will start cooking, some drinks need their ingredients to cook for X time. You can check the current cook time of a cauldron by right clicking it with a clock in hand, doing so will provide a short message of the current cook time.

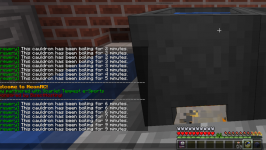

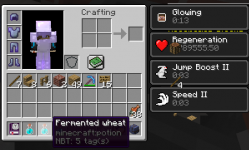
After you've added all your drinks and have cooked them for as long as you need to, use empty bottles to collect the base drink from the cauldron.
This base drink won't have any effects and is meant to be used in the next following steps to finish the drink. These steps could be distilling, aging, or both.
-----------------------------------------------------------------------------------------------------------------------------------------------------------------------------------------------------------------------------------
Step 2 - Distilling Stand
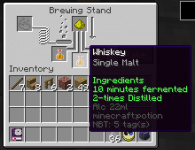
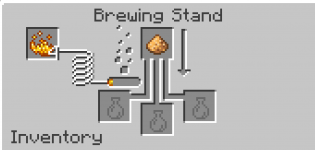
To create a Distilling Stand, place a brewing stand and inside the brewing stand's top slot, put a piece of glow stone dust. Afterwards you can start distilling a drink or a base drink by placing the drinks in the potion slots.
At this point it will start distilling your drinks. Depending on the recipe, it will take different amounts of time to distill it. Some recipes also need your drinks to have multiple distill runs.
-----------------------------------------------------------------------------------------------------------------------------------------------------------------------------------------------------------------------------------
Step 3 - Aging Barrel
Before creating an Aging Barrel, know that the barrel's wood type matter and there are 2 barrel sizes you can make called small and large barrels.
- To create a small barrel you'll need 8 wood stairs and 1 sign. Build a structure similar to the one in the labeled image below.
- To create a large barrel you'll need 12 wood stairs, 15 wood planks, 5 wood fences, and 1 sign. Build a structure similar to the labeled image below.
After building the structure, place the sign on the structure with the word "Barrel". If done correctly, a message will indicate the barrels creation.
You can now right click the barrel to view it Aging slots. A small barrel will have a capacity of 9 aging slots, while a large barrel will have a capacity of 27 aging slots
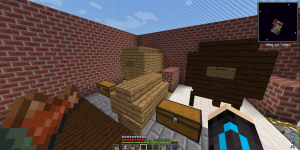
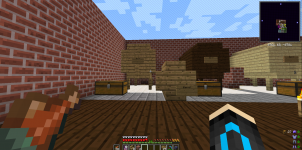
To start using aging your drinks, just simply place drinks inside of your Aging Barrels and it will start aging over time. In recipes, Age is listed in years, this equates to 20 minutes in game time per year. Again, every 20 minutes is 1 year of age. This means that if a recipe says a drink needs to age to 3, it means it needs to age for 60 minutes. Be careful not to overage your drinks as that could harm your drinks quality rating
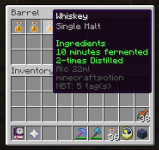

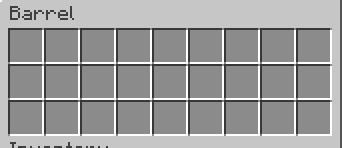
Pictures provided by Vain163 and Zlightraven, thank you!
This is an supposed to be an exhaustive guide to help understand the custom drinks on our Skyblock server and how to brew them. The contents of this post will be updated and edited when needed.
-----------------------------------------------------------------------------------------------------------------------------------------------------------------------------------------------------------------------------------
Intro

Before you start brewing, you need to know what drink you want to brew. All drink recipes can be found and reviewed with NPC Anya located in the Tavern Cellar on Tutorial Island.
Certain drinks can mostly provide benefits which ranges from Items such as keys, Currencies such as coins, or Effects such as Health boost.
All drinks will make you drunk by a certain % amount, as you get drunk you will stumble around, chat incoherently, and eventually vomit.
-----------------------------------------------------------------------------------------------------------------------------------------------------------------------------------------------------------------------------------
Rating
When you finish a brewing a drink, it will get a quality ★★★★★ rating based on how accurately you follow a drink's recipe. The quality rating can range from 1-10 and will be displayed in the drink's Lore in the form of ☆ and ★, Each ☆ is equivalent to 1 and each ★ is equivalent to 2. Based on quality, the drink gets a Grade which can be Bad (Quality 1-4), Good (Quality 5-9), Perfect (Quality 10).
The effect, name, and lore of a drink can change depending on it's quality or grade (more often it will be grade based). For example, the drink type below called Campfire shows that its effect of Health Boost becomes stronger depending on its grade and that it's lore and name also change too.


-----------------------------------------------------------------------------------------------------------------------------------------------------------------------------------------------------------------------------------
Step 1 - Cooking Cauldron
Now to get started with brewing a drink, you'll need to set up several faculties. Namely, a Cooking Cauldron, Distilling Stand, and Aging Barrel. A quick example of these facilities is available in-game in the Tavern Cellar on Tutorial Island.

To create a Cooking Cauldron, you need a cauldron with water placed directly over any heat source, it is highly recommended to use campfires as the heat source but other sources like lava or fire work too.
At this point you've made a Cooking Cauldron and can now start cooking your ingredients to brew.

To put ingredients in to start cooking, just right click your cooking cauldron with your ingredient in hand to add it to the cauldron. At this point you can continue to add ingredients as you see fit, just know that if it doesn't resemble a recipe it will result in a failed base drink.
Anyways, while your ingredients are in the cauldron they will start cooking, some drinks need their ingredients to cook for X time. You can check the current cook time of a cauldron by right clicking it with a clock in hand, doing so will provide a short message of the current cook time.


After you've added all your drinks and have cooked them for as long as you need to, use empty bottles to collect the base drink from the cauldron.
This base drink won't have any effects and is meant to be used in the next following steps to finish the drink. These steps could be distilling, aging, or both.
-----------------------------------------------------------------------------------------------------------------------------------------------------------------------------------------------------------------------------------
Step 2 - Distilling Stand


To create a Distilling Stand, place a brewing stand and inside the brewing stand's top slot, put a piece of glow stone dust. Afterwards you can start distilling a drink or a base drink by placing the drinks in the potion slots.
At this point it will start distilling your drinks. Depending on the recipe, it will take different amounts of time to distill it. Some recipes also need your drinks to have multiple distill runs.
-----------------------------------------------------------------------------------------------------------------------------------------------------------------------------------------------------------------------------------
Step 3 - Aging Barrel
Before creating an Aging Barrel, know that the barrel's wood type matter and there are 2 barrel sizes you can make called small and large barrels.
- To create a small barrel you'll need 8 wood stairs and 1 sign. Build a structure similar to the one in the labeled image below.
- To create a large barrel you'll need 12 wood stairs, 15 wood planks, 5 wood fences, and 1 sign. Build a structure similar to the labeled image below.
After building the structure, place the sign on the structure with the word "Barrel". If done correctly, a message will indicate the barrels creation.
You can now right click the barrel to view it Aging slots. A small barrel will have a capacity of 9 aging slots, while a large barrel will have a capacity of 27 aging slots


To start using aging your drinks, just simply place drinks inside of your Aging Barrels and it will start aging over time. In recipes, Age is listed in years, this equates to 20 minutes in game time per year. Again, every 20 minutes is 1 year of age. This means that if a recipe says a drink needs to age to 3, it means it needs to age for 60 minutes. Be careful not to overage your drinks as that could harm your drinks quality rating


Pictures provided by Vain163 and Zlightraven, thank you!
Last edited: